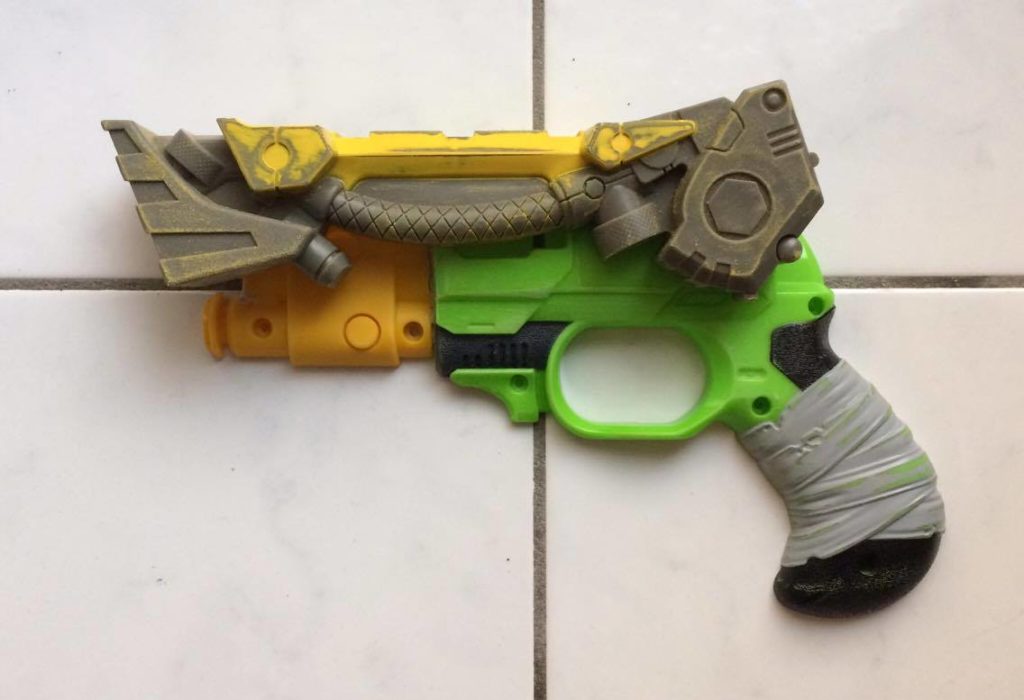
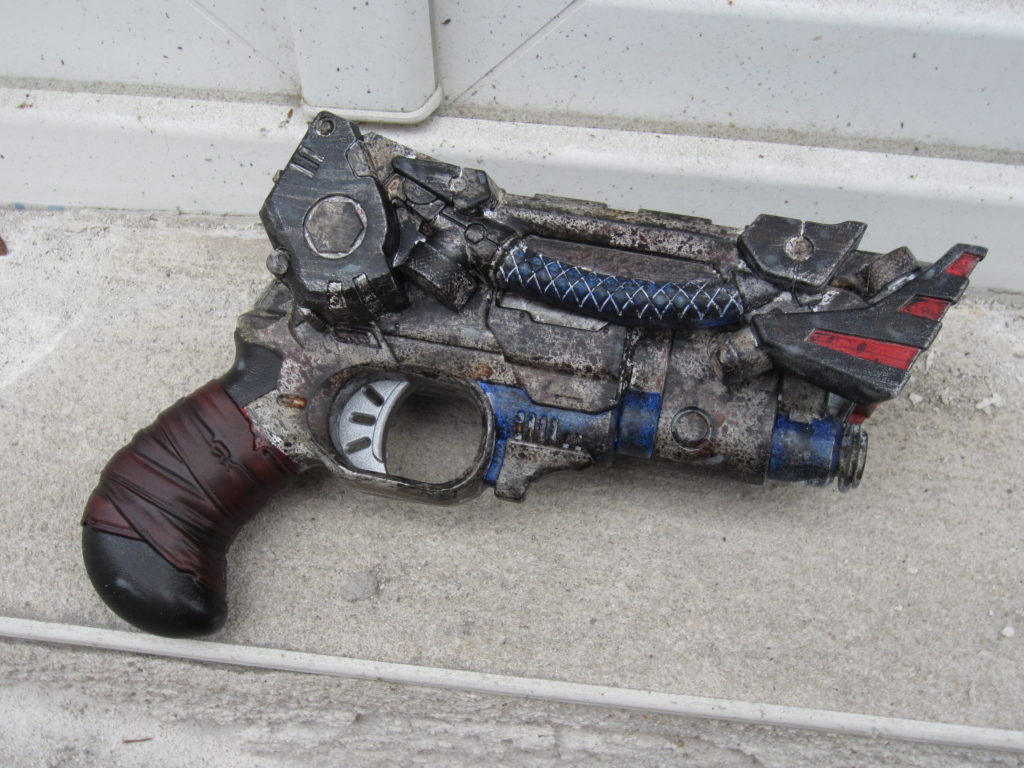
Optical Modding: Blaster Paintjobs step by step
The optical enhancement of blasters is one of the two core areas of the modding scene. In this series of texts you will learn the basics and pick up some tips and tricks.
No matter if the Blaster has been rebuilt or if the shell stays as it is, the preparation for painting is the same from here on.
1 Sanding
2 Rinsing
3 Degreasing
4 Priming
5 Painting
6 Coating
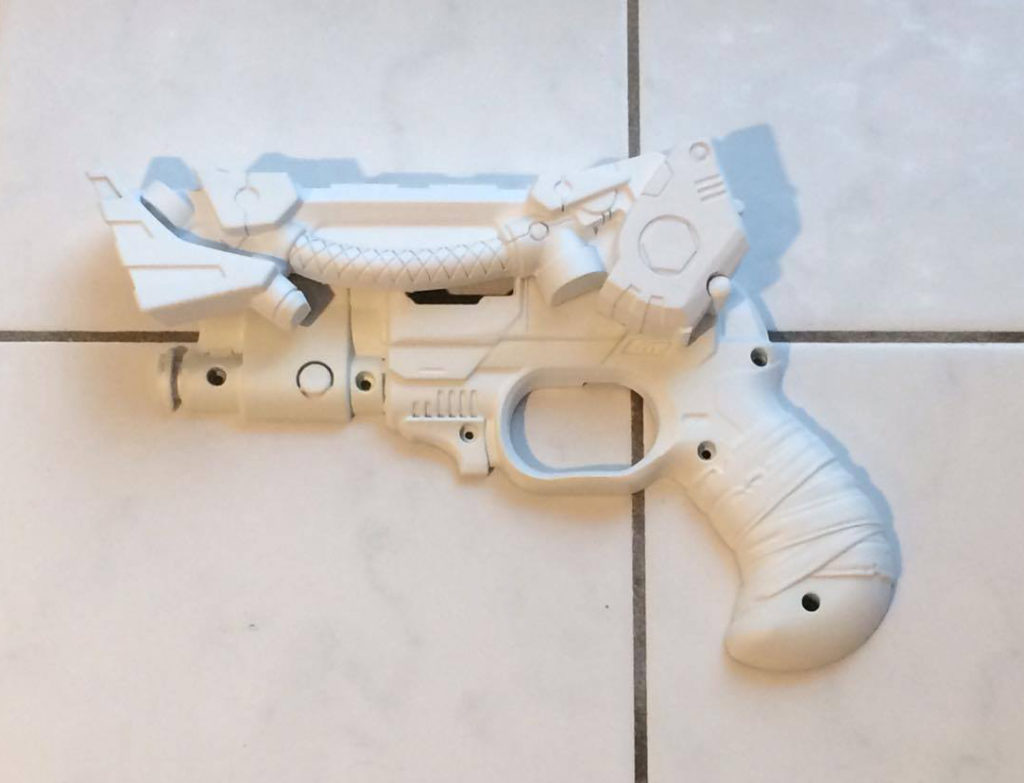
1 Sanding
A Blaster should at least be roughened before painting. This improves the adhesion of the paint on the plastic and produces long-lasting results. I even go much further and sand my blaster completely. I mainly try to get rid of things that bother me afterwards. These are mainly CE-marks, copyright symbols, warnings, the digital camo pattern of the Nerf Elite series, production numbers and in case of LARP blasters also the company logos. However, whether these are sanded down depends on the use. I personally achieve the best and fastest results in sanding with an eccentric sander with a grit of 120 for rough sanding and 180 – 400 for fine sanding. For some blasters, a Dremel is recommended for the most difficult corners, but in case of doubt everything can be done by hand.
There is a huge difference of opinion about how much you have to sand a blaster. I know a lot of modders who just roughen the blaster with an abrasive fleece and then go on. I myself prefer to sand the blaster quite thoroughly. But you do not have to overdo it completely. If you can’t reach one spot of the blaster, there is a good chance that the usual wear and tear won’t reach that spot either and thorough sanding is unnecessary. In any case, it is important to make sure the surface of the blaster is no longer shiny. This should be your minimum goal.
When you have finished sanding, you should first rinse the Blaster properly.
2 Rinse
I use a standard kitchen sponge with a little dish soap. Make sure the Blaster is properly cleaned of sanding dust, as this would later reduce the adhesion of paint and glue. It is important to let the Blaster dry properly after rinsing. Depending on the chalk content in your water, you should take special care to ensure no drops remain on the blaster and evaporate, in order to prevent dust or chalk spots from forming in depressions and corners, which would later impair the paint. After rinsing and shortly before priming, it is recommended to degrease the surfaces again before painting.
3 Degreasing
For degreasing I use brake cleaner. Just apply it on a cloth and rub the blaster. You can also degrease with other means, but it is important to make sure you don’t use a solvent which could damage the plastic. From this step on I recommend the use of latex gloves. It is important to ensure the cloth is clean and does not leave any fuzz or fluff behind. I prefer discarded T-shirts. It is also important to keep the degreased blaster dust-free and avoid contact with your own skin, as it is greasy. When the blaster is prepared in this way, it is time for the primer.
4 Priming
The primer serves as an adhesion agent and, depending on the brand used, has nothing to do with the final paint job. There are primers or also adhesion primers in different variations, colours and price ranges. Classic products are the spray cans of Games Workshop and ArmyPainter, which are definitely not bad products, but for blasters they are not exactly cheap due to the large surface area.

In general, all primers which are suitable for plastics can be used, including a wide range of universal primers. However, I prefer the plastic primer from the Montana Tech Primer series and will refrain from using all possible alternatives in the following and limit myself as far as possible to the Montana products I use. The Montana Primer is colourless and therefore suitable for any covering paint. Priming is not primarily about applying a closed, opaque layer of paint, but only about spraying it over the blaster a few times to spread a thin layer of adhesion agent on the blaster. In most cases much less than one would expect is sufficient for this. After the priming, the actual painting process continues.
5 Painting
There are countless techniques and ways to paint a Blaster. Since it is impossible to list everything here, I will limit myself to presenting and discussing a limited number of techniques that I consider interesting for common paint jobs and which should enable you to develop your skills in the direction you have in mind.
After the priming with adhesive primer I usually apply the surface primer to all parts with the chosen base colour. Depending on how many parts I have and which colour scheme I want to achieve, I paint all parts in the same base colour or differentiate by colour which base colour is painted on. For me, acrylic based spray paints have proven to be very useful. I use them for the base colours and large areas, it is of course also possible to paint a whole blaster using a brush. I find it easier to work with spray paint and the result is usually more even. But this is something that everyone has to try out for themselves.
Masking
After the first coloured layer of paint, I usually use masking tape and newspaper to cover certain parts of the blaster and thus paint individual areas in different colours to make the blaster more interesting. The technical term for that is „masking“. If we now want to build a blaster that is not a brand new one but a rancid, old postapocalyptic blaster, it is a good idea to mask scratches and paint flaking with masking fluid before applying the remaining layers of paint. However, there are many different ways to achieve paint flaking and damage.
Flaking Paint Effect
For example, you can simply paint them on. To do this, you usually first paint the paint flake in black on the surface, then repaint it with silver, so only a very thin black edge remains and provides a stronger contrast. Then, depending on the size, some rust or paint residue from the top coat into the middle. You can find detailed instructions on this on Blasted.de (German).
However, this method requires a little practice. It is much easier to use masking fluid. This involves applying a kind of fast-drying rubber to the surface, then painting over it and, after drying, removing the rubber. This creates real paint flaking, which you can then embellish with silver, rust and so on.
Another method is the so-called hairspray method. There are detailed YouTube videos on this method, so here only in short: Between two layers of paint an intermediate layer of water-soluble hairspray is applied, which is partially dissolved again after painting. This partially destroys the upper surface coating. This method achieves very realistic effects, but in my experience it is not very good with spray paint, because the paint layer gets too thick and you can hardly hurt it to dissolve the hairspray without directly scraping all layers of paint from the blaster. The hairspray method is especially recommended for owners of an air brush. You can find detailed instructions on all the methods mentioned and more on Blasted.de (German).
Of course it is also a valid option to start by painting the blaster with rust or wear and tear effects on a large area and then build up the next layer with masking fluid or hairspray. This way you save yourself the trouble of painting the areas after the topcoat has been broken open and you immediately have a proper aging effect.
Drybrushing & Inking
In addition to these painting techniques, drybrushing and the so-called inking should also be mentioned as painting techniques.
When dry brushing, use as little paint as possible on the brush and apply only very small amounts of paint to the edges of the blaster. The effect achieved in this way gives the edges, for example when using silver, a metallic shine and, if well done, looks as if the edges have been worn out over time because metal flashes through the paint. Detailed instructions on YouTube (German).
When inking, you use very diluted ink (usually black and brown for blasters) and spread it generously over the blaster. Afterwards wipe the raised areas clean again. The ink accumulates in depressions and gives the blaster additional depth and simulates dirt build-up as it occurs when you wipe surfaces often, but don’t clean the deepest corners.
There are plenty of good tutorials for both techniques on blasted.de and Youtube.
In addition to these more classical approaches, there are a whole range of alternative ways to design a blaster. Other keywords would be sticker bomb, decals, water transfer printing, and many more. It would go beyond the scope of this article to explain everything. But we will go into some special techniques separately in the future.
6 Coating
Since dartblasters are usually toys that we want to use, it is important to protect the surface as much as possible. Some wear and tear is always inevitable. However, with clear coating you can usually extend the life span of your paint job quite a bit.
It is important to note that the clear lacquer must be compatible with all lower lacquer and paint types, otherwise in a worst case scenario they could dissolve, attack and damage each other. This is another reason why I rely completely on the Montana series. It should also be noted that glossy clear coating has a much higher surface tension than matt coating. Therefore, blasters can be sealed with glossy coating first and then, depending on the optical requirements, with matt clear coating to define the final look.
Tips and Tricks
Finally a few words about the colors used in general.
Finally a few words on the used paint in general. I exclusively use acrylic paint on blasters. Whether spray paint, cans, tubes or pens, depending on what I have or seems practical to me. I made the experience that it doesn’t matter if you take the expensive paints from the miniature area (e.g. Games Workshop) or if you buy cheap artist acrylic paints in bigger packages from Aldi, NanuNana, Idee or elsewhere. Even tinting paints from the hardware store can be used. The only important thing is that the colours are compatible with each other and that no different solvents are combined, because this can go well, but it can also lead to whole layers of paint peeling off or otherwise react strangely.
If in doubt, I test my colours on a piece of plastic waste to check if all materials work together.
Have fun redesigning the look of your blaster!
Everything you need is available from one source here at Blasterparts.com
Author: SirScorp


